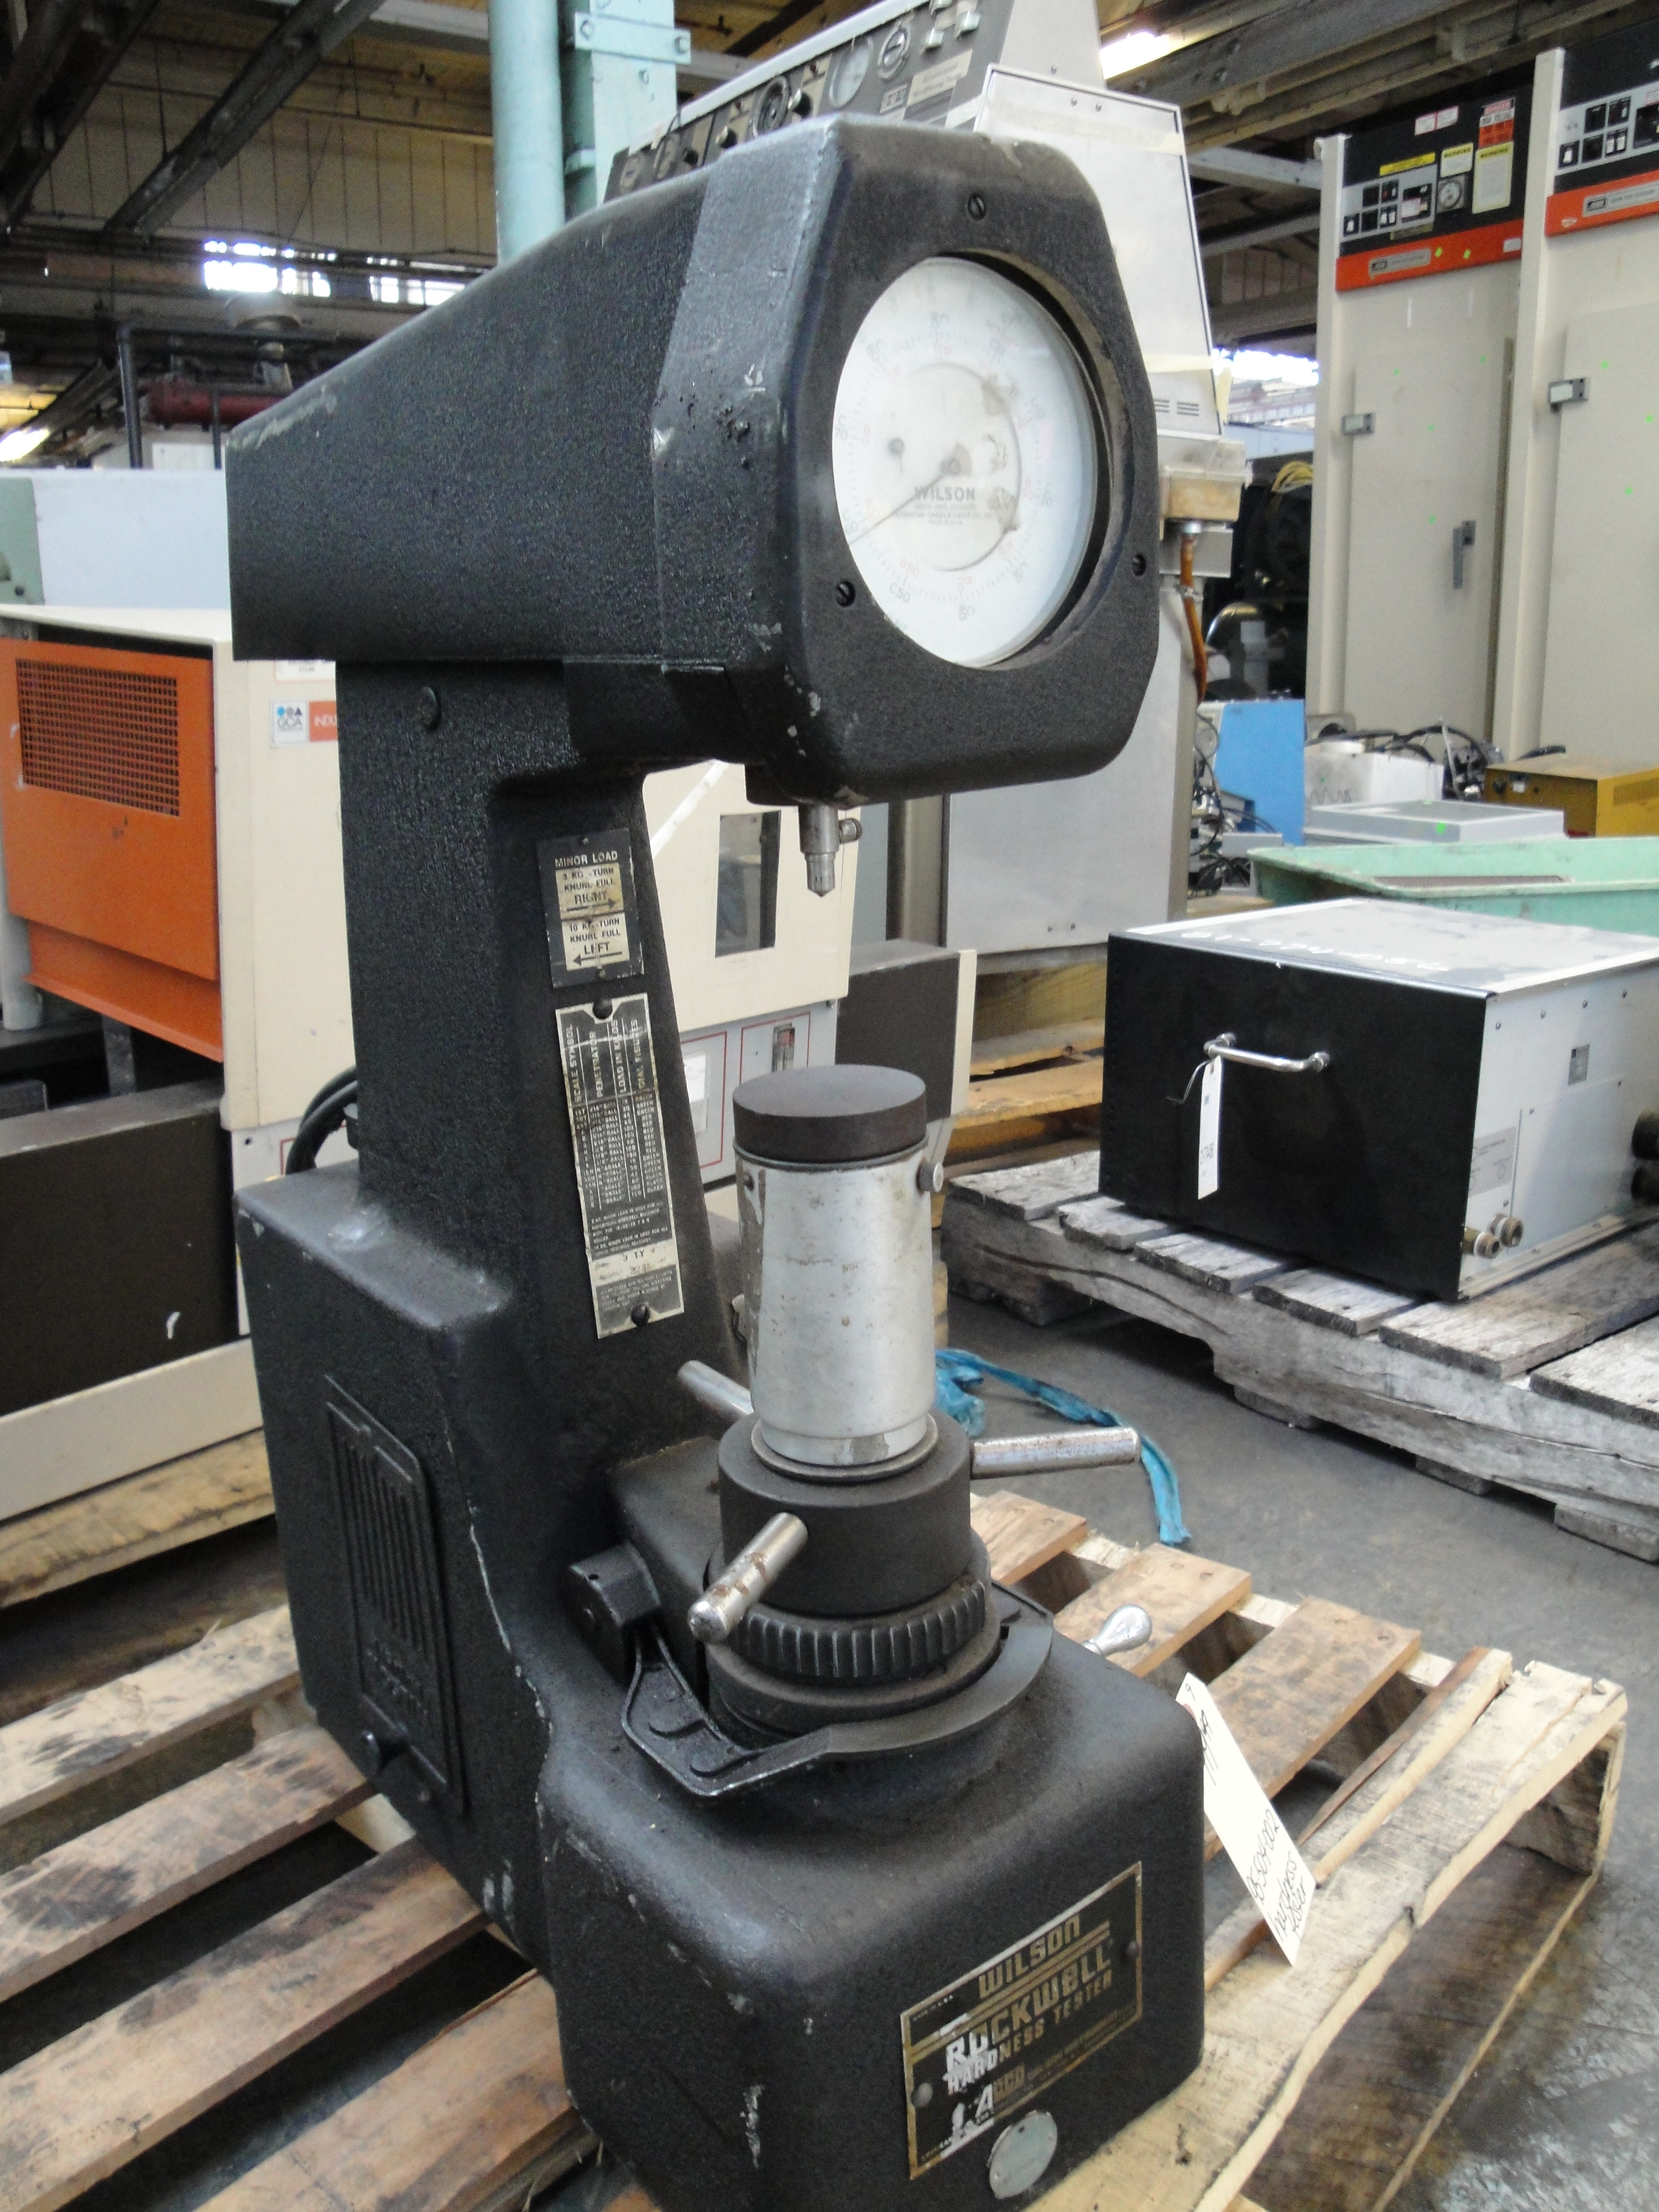
Rockwell scale on:
[Wikipedia]
[Google]
[Amazon]
 The Rockwell scale is a hardness scale based on indentation hardness of a material. The Rockwell test measures the depth of penetration of an indenter under a large load (major load) compared to the penetration made by a preload (minor load). There are different scales, denoted by a single letter, that use different loads or indenters. The result is a dimensionless number noted as HRA, HRB, HRC, etc., where the last letter is the respective Rockwell scale.
When testing metals, indentation hardness correlates linearly with tensile strength.
Video on the Rockwell hardness test
Hardness Conversion Chart
Hardness Conversion Table
Rockwell Hardness Testing
{{Authority control Dimensionless numbers Hardness tests
 The Rockwell scale is a hardness scale based on indentation hardness of a material. The Rockwell test measures the depth of penetration of an indenter under a large load (major load) compared to the penetration made by a preload (minor load). There are different scales, denoted by a single letter, that use different loads or indenters. The result is a dimensionless number noted as HRA, HRB, HRC, etc., where the last letter is the respective Rockwell scale.
When testing metals, indentation hardness correlates linearly with tensile strength.
History
The differential depth hardness measurement was conceived in 1908 by Viennese professor Paul Ludwik in his book ''Die Kegelprobe'' (crudely, "the cone test"). The differential-depth method subtracted out the errors associated with the mechanical imperfections of the system, such as backlash and surface imperfections. The Brinell hardness test, invented in Sweden, was developed earlier – in 1900 – but it was slow, not useful on fully hardened steel, and left too large an impression to be considered nondestructive. Hugh M. Rockwell (1890–1957) and Stanley P. Rockwell (1886–1940) fromConnecticut
Connecticut () is the southernmost state in the New England region of the Northeastern United States. It is bordered by Rhode Island to the east, Massachusetts to the north, New York to the west, and Long Island Sound to the south. Its cap ...
in the United States
The United States of America (U.S.A. or USA), commonly known as the United States (U.S. or US) or America, is a country primarily located in North America. It consists of 50 U.S. state, states, a Washington, D.C., federal district, five ma ...
co-invented the "Rockwell hardness tester," a differential-depth machine. They applied for a patent on July 15, 1914. The requirement for this tester was to quickly determine the effects of heat treatment on steel bearing races. The application was subsequently approved on February 11, 1919, and holds . At the time of invention, both Hugh and Stanley Rockwell worked for the New Departure Manufacturing Co. of Bristol, CT
Bristol is a suburban city located in Hartford County, Connecticut, United States, southwest-west of Hartford. The city is also 120 miles southwest from Boston, and approximately 100 miles northeast of New York City. As of the 2020 census, the ...
. New Departure was a major ball bearing manufacturer which in 1916 became part of United Motors and, shortly thereafter, General Motors Corp.
After leaving the Connecticut company, Stanley Rockwell, then in Syracuse, NY, applied for an improvement to the original invention on September 11, 1919, which was approved on November 18, 1924. The new tester holds .S. P. Rockwell, "Hardness-Testing Machine", , Nov 1924. Rockwell moved to West Hartford, CT, and made an additional improvement in 1921. Stanley collaborated with instrument manufacturer Charles H. Wilson of the Wilson-Mauelen Company in 1920 to commercialize his invention and develop standardized testing machines. Stanley started a heat-treating firm circa 1923, the Stanley P. Rockwell Company, which still exists in Hartford, CT. The later-named Wilson Mechanical Instrument Company has changed ownership over the years, and was acquired by Instron
Illinois Tool Works Inc. or ITW is an American Fortune 200 company that produces engineered fasteners and components, equipment and consumable systems, and specialty products. It was founded in 1912 by Byron L. Smith and has built its growth o ...
Corp. in 1993.
Models and operation
Force diagram of Rockwell test upA closeup of the indenter and anvil on a Rockwell-type hardness tester The Rockwell hardness test can be conducted on several various hardness testers. All testers, however, fall under one of three categories. Bench model hardness testers can be found either in a digital or analog model. Digital bench models utilize a digital display and typically take more technical training to be able to operate, whereas the analog models are simpler to operate as well as very accurate and display results on a dial on the front of the machine. All bench model testers are usually found within a workshop or laboratory setting. Other testers are portable, and all portable testers will come in a digital model including a digital results screen similar to that of the bench digital model. Nowadays, some companies may prefer employees to use these portable testers as they may be found to be the easiest and most practical to use. One popular brand among engineers is the Phase portable tester which also includes the options to perform several other types of hardness tests including Brinell, Vickers, and Shore. This proves to be the most efficient form of on-the-go testing throughout a manufacturing setting. This also disregards the need for a conversion chart since all of the work is done within the Phase portable tester. The determination of the Rockwell hardness of a material involves the application of a minor load followed by a major load. The minor load establishes the zero position. The major load is applied, then removed while still maintaining the minor load. The depth of penetration from the zero datum is measured from a dial, on which a harder material gives a lower measure. That is, the penetration depth and hardness are inversely proportional. The chief advantage of Rockwell hardness is its ability to display hardness values directly, thus obviating tedious calculations involved in other hardness measurement techniques. The Rockwell test is very cost-effective as it does not use any optical equipment to measure the hardness based on the small indention made, rather all calculations are done within the machine to measure the indention in the specimen, providing a clear result in a manner in which is easy to read and understand once given. This also prevents any reworking or finishing needing to be done to the specimen both before and after testing. However, it is critical to double check specimens as the smallest indentions made from testing could potentially result in incorrect measurements in hardness, leading to catastrophe. After time, the indenter on a Rockwell scale can become inaccurate as well and need replacing to ensure accurate and precise hardness measurements. The equation for Rockwell Hardness is , where ''d'' is the depth in mm (from the zero load point), and ''N'' and ''h'' are scale factors that depend on the scale of the test being used (see following section). It is typically used in engineering andmetallurgy
Metallurgy is a domain of materials science and engineering that studies the physical and chemical behavior of metallic elements, their inter-metallic compounds, and their mixtures, which are known as alloys.
Metallurgy encompasses both the sc ...
. Its commercial popularity arises from its speed, reliability, robustness, resolution and small area of indentation.
Legacy Rockwell hardness testers operation steps:
# Load an initial force: Rockwell hardness test initial test force is ; superficial Rockwell hardness test initial test force is .
# Load main load: reference below form / table 'Scales and values'.
# Leave the main load for a "dwell time" sufficient for indentation to come to a halt.
# Release load; the Rockwell value will typically display on a dial or screen automatically.
In order to get a reliable reading the thickness of the test-piece should be at least 10 times the depth of the indentation. Also, readings should be taken from a flat perpendicular surface, because convex surfaces give lower readings. A correction factor can be used if the hardness of a convex surface is to be measured.
Scales and values
There are several alternative scales, the most commonly used being the "B" and "C" scales. Both express hardness as an arbitrary dimensionless number. * Except for testing thin materials in accordance with A623, the steel indenter balls have been replaced by tungsten carbide balls of the varying diameters. When a ball indenter is used, the letter "W" is used to indicate a tungsten carbide ball was used, and the letter "S" indicates the use of a steel ball. E.g.: 70 HRBW indicates the reading was 70 in the Rockwell B scale using a tungsten carbide indenter. The ''superficial'' Rockwell scales use lower loads and shallower impressions on brittle and very thin materials. The 45N scale employs a 45-kgf load on a diamond cone-shaped Brale indenter, and can be used on denseceramic
A ceramic is any of the various hard, brittle, heat-resistant and corrosion-resistant materials made by shaping and then firing an inorganic, nonmetallic material, such as clay, at a high temperature. Common examples are earthenware, porcelai ...
s. The 15T scale employs a 15-kgf load on a hardened steel ball, and can be used on sheet metal.
The B and C scales overlap, such that readings below HRC 20 and those above HRB 100, generally considered unreliable, need not be taken or specified.
Typical values include:
* Very hard steel (e.g. chisels, quality knife blades): HRC 55–66 (Hardened High Speed Carbon and Tool Steels such as M2, W2, O1, CPM-M4, and D2, as well as many of the newer powder metallurgy Stainless Steels such as CPM-S30V, CPM-154, ZDP-189. There are alloys that hold a HRC upwards 68-70, such as the Hitachi developed HAP72. These are extremely hard, but also somewhat brittle.)
* Axes: about HRC 45–55
* Brass: HRB 55 (Low brass, UNS C24000, H01 Temper) to HRB 93 (Cartridge Brass, UNS C26000 (260 Brass), H10 Temper)
Several other scales, including the extensive A-scale, are used for specialized applications. There are special scales for measuring case-hardened specimens.
Standards
* International ( ISO) ** ISO 6508-1: Metallic materials—Rockwell hardness test—Part 1: Test method (scales A, B, C, D, E, F, G, H, K, N, T) ** ISO 6508-2: Metallic materials—Rockwell hardness test—Part 2: Verification and calibration of testing machines and indenters ** ISO 6508-3: Metallic materials—Rockwell hardness test—Part 3: Calibration of reference blocks ** ISO 2039-2: Plastics—Determination of hardness—Part 2: Rockwell hardness * US standard ( ASTM International) ** ASTM E18: Standard methods for Rockwell hardness and Rockwell superficial hardness of metallic materialsSee also
* Brinell hardness test * Hardness comparison * Holger F. Struer * Knoop hardness test * Leeb Rebound Hardness Test * Meyer hardness test * Mineral * Shore durometer * Tensile strength * Vickers hardness testReferences
External links
Video on the Rockwell hardness test
Hardness Conversion Chart
Hardness Conversion Table
Rockwell Hardness Testing
{{Authority control Dimensionless numbers Hardness tests